Sunday 7 December 2014

Final Cinematic

So today I had my final presentation where I showed my environment to the class - I went through alot of what I went through on my previous posts in this blog.

I hope you enjoy the video!


Finalised screenshots of 'Murder in France'

So after 3 months I have finished my project and I am quite happy with it, I will continue working on the props as I need a lot of time to polish them!

I hope you enjoy the screenshots.


Saturday 6 December 2014

Decals and other small details

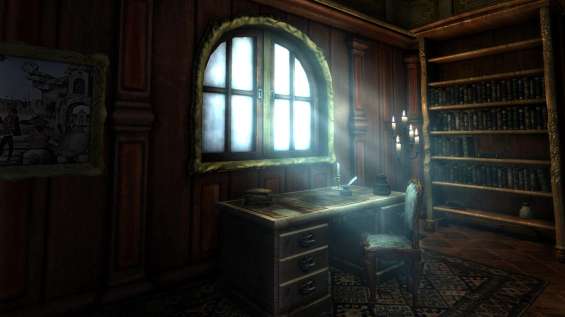
Now that I had the lighting nailed down I wanted to create some minor but subtle effects to the environment so I decided to add some decals onto the walls as they looked a bit plain. Along with some blood splats.

Making decals in UE4 is very simple I will explain how I made them here:


Making sure your canvas size is 1024 x 1024 (or by the power of 2) I added a piece of dirt and nothing else around it.


I then colour pick the colour of the dirt, make a new layer below the original one and alt+backspace to fill it. Then Shift click the layer icon with the piece of dirt, go into channels properties and click save selection as channel which will create an alpha channel, now just save it as a TGA and go into UE4.

Then I imported the texture into UE4 right clicked it and selected create material - I then made the material a deffered decal and put the alpha into opacity, and bam done :) easy!


Moonlight god rays re adjusting the lighting

After posting lots of my photos onto Facebook lots of my friends commented with feedback - I had gotten alot from Ashley Thudnercliffe, Damon Sloane and Edvinas Petrauskas - they suggested some really cool ideas, some of them where that because my scene was very orange due to the candle lights adding some blue lights coming through the windows would give it some really cool effects aswell as showing moonlight, also blue compliments orange very well.

So the problems I was getting was that light was coming in from both windows when the moon waas only meant to shine on one side of the environment - here the green line shows that lights are coming in through both windows.

Here are some references I tryed to replicate:

http://static5.gamespot.com/uploads/original/536/5360430/2561072-lotf_om_infested_fight.jpg


http://4.bp.blogspot.com/-Ff_23EtL_4E/UXSVtkSsXEI/AAAAAAAAAFw/SUNBlifF06s/s400/Amnesia+2013-04-21+20-33-56-24.png
http://img3.wikia.nocookie.net/__cb20131103010319/amnesia/images/7/78/Amnesia_Archives.jpg


Deleting the lights I had outside made for a more dynamic piece and more realistic as show below.


As you can also see I put candles on the sides of the room and turned on all of the chandeliers as alot of people were complaining the scene was way to dark which I completely agree with. So made some major changes.

The body bag hanging Marvelous Designer

I am now onto making the main asset of the main murder room!

So my main idea for this was to create a body bag hanging from the ceiling I researched as much as I could and found a few very good references:

(REFERENCES)
http://www.kazperstan.co.uk/lastofus.html
http://photos1.blogger.com/blogger/7397/1962/320/sept%205,%202006%20018.jpg

I first tryed to create the body bag in mMya but realised it would be alot quicker, efficient and alot more realistic if I made it in Marvelous Designer (used trial version). I simply made 4 rectangles for the main peice of the cloth so it would zip up like a body bag then 2 squares for the head and the feet, I then created elastic bands around the feet, middle and head, to make it look like it was tightened by rope.

I created the rope in maya using curve tools and unifyed unwrapped it.


So here is the finalised body bag - the cloth was a material I made in UE4 which I also used for the other bits of cloth in the scene. The blood was added in photoshop using some stained blood photos taken from google and other sites.